Wireless Ubuntu
Wi-Fi Configuration – Ubuntu
These instructions are specific to Ubuntu 11.10, but should work with 9.x – 12.x.
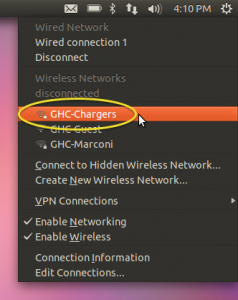
- Click the Wi-Fi icon at the top right of the screen next to the clock.
-
From the drop-down list select “GHC-Student” for students, “GHC-Employee” for faculty/staff.
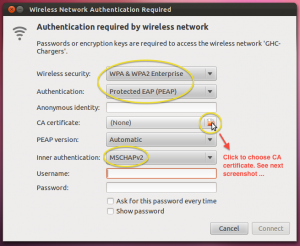
- Change the “Wireless security”, “Authentication” and “Inner authentication” settings to the values shown below, then click the icon to the right of the “CA certificate” section.
-
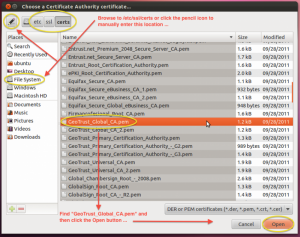
Browse to /etc/ssl/certs or click the pencil icon to manually enter this location, then choose the file named “GeoTrust_Global_CA.pem” and click the Open button.
- Type in your network username and password used to logon to e-mail.
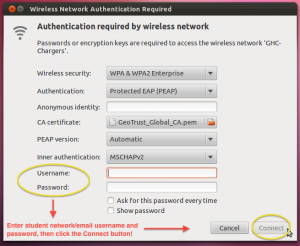
- Click “Connect”.
You should now be connected! Still having problems? Contact Us!